How to fit a plinth, cornice and pelmet
Finishing touches often that have the biggest impact
It’s often the small finishing touches that can have the biggest impact. Plinths, cornices, end panels, clad on panels and pelmets are important factors in this, helping tie each element of the room together. Luckily, they’re also fairly easy to install with a bit of know-how.
Most accessories come with their own detailed fitting instructions, which you should always follow.

What are they?
Plinths, cornices and pelmets are finishing products, used in specific areas of the kitchen, to different effects.
Plinths go between the bottom of the base cabinets and the floor. Not only do they stop dirt from getting kicked beneath cabinets, they also provide a nice neat transition between the cabinets and the floor.
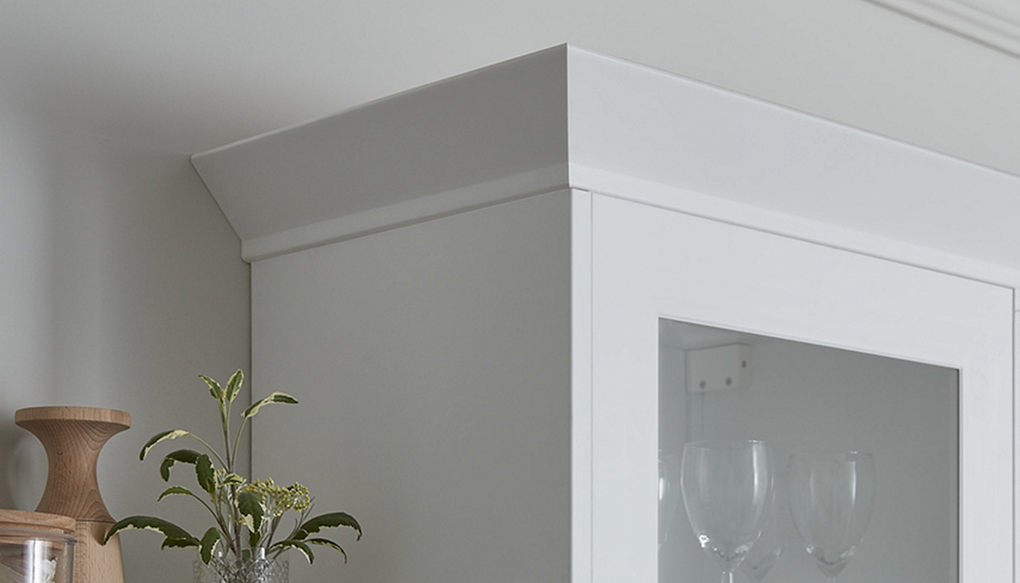
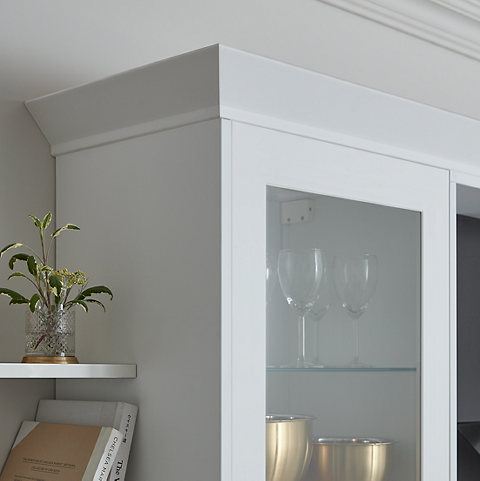
Cornices are installed along the top of a wall cabinet, to help fill the space between the cabinet and the ceiling, hide the top and generally give the cabinet a feeling of height.
Pelmets sit at the bottom of wall cabinets, helping to hide the bottom of them, which might have integrated lighting or just be unfinished (and as such, should remain hidden.)
Preparation
Plinths, cornices and pelmets are only installed once the rest of your kitchen has been set up: that includes fixed wall and base cabinets, and flooring. Give your space a quick clean first, especially as debris from your kitchen fitting could get in the way.
Then, grab your tools which will include: a mitre block and fine toothed saw (or a power mitre saw), a jigsaw, a 90° try square, a measuring tape and pencil, a screwdriver, screws and of course your plinths, pelmets, cornices, and associated brackets and clips (more so for plinths than anything else.)
Step 1
Before you install it, your plinth might need cutting to size. If you have clad on or end panels that touch the floor, cut the plinths so they sit just inside. To cut, mark the lines with a pencil, and use a try square to ensure you’ve marked a 90° square angle. Then, use your saw to cut the end of your plinth.
Step 2
Again, if your plinths are taller than the height between the cabinet and floor, you may need to trim them lengthways. If you’re fitting a plinth seal strip you’ll need to allow for that too. To cut down the plinth, measure the height between the cabinet and floor and mark the plinth appropriately (on the side that won’t be visible) before trimming it with a jigsaw. Usually it’s best to cut the plinth 2-3mm shorter than the height between the cabinet and floor to make it easier to fit or remove them. If the small gap is at the top it won’t be visible after the plinth is fitted.
Step 3
Once the plinth is cut to size, place it in front of the cabinet, with the side that won’t be visible facing up, and the cut edge (if you cut the plinth lengthways) facing outward. Mark the position of the feet with a pencil halfway up the back of the plinth board, then screw a clip bracket into each mark, before sliding the clips into each bracket, and lifting the plinth into place so that each clip grips each foot of the cabinet.
Cornices and pelmets are fitted in a similar way, the only difference is that cornices go on the top of the cabinet and pelmets on the bottom.
Step 1
Both will need to be cut to size before they can be used. The cuts and joints will be on show so they need to be measured and cut very accurately!
Measure each run of wall cabinets and cut the appropriate lengths with your mitre saw. The cuts might be at a 90° angle if the end sits against a wall or panel, or at 45° if you want to form a mitred corner.
Careful planning and accurate measuring is essential to get this right so take your time and don’t cut anything until you are 100% sure it is correct. Following the specific instructions that come with the product will help you to get this right!
Step 2
Once they’ve been cut to the correct length and angles, it’s time to attach them to the units themselves. Pre-drill the pieces ready for screw fixing to the cabinets. Then, ask a friend to help hold it in place on the cabinet while you fix with the correct length screws. Where pieces meet at a corner, you can use some mitre bond adhesive to secure the joint between the 2 pieces for a really neat finish.
Replacement end panels give kitchen cabinets a clean finish, by maintaining the style of your fascias over the rest of the cabinet. They’re easy to install and can be a neat finishing touch.
A replacement end panel is exactly that! It directly replaces the standard white end panel of the cabinet so just follow the cabinet assembly instructions and substitute the coloured end panel for the standard white one in the cabinet pack.
Clad-on end panels fix to the end of your units after the cabinets are assembled and in place to complete the look. They’re a finishing touch to improve the overall finish. Clad-on panels either have a rounded or straight exposed front edge so you can choose which works best for your kitchen.
To get a good fit and finish you should always follow the instructions that come with the panels carefully.
If you have tiles on the wall, the panels can be fixed directly over them without having to remove the tiles first.
The panel is supplied taller and wider to allow for accurate trimming to compensate for uneven walls and floors. For a perfect fit, a scribing kit should be used (sold separately). In this article, we’ll explain the basics of trimming.
Tools for the job:
Step 1
Begin by understanding if your clad-on panel will be covering only the height of the end of your cabinet, or whether you also need to include the height of any cornice or pelmets above and beneath.
Step 2
Clamp your clad-on panel to your cabinet, being sure to allow for covering the thickness of the door once it’s in place within your measurements. For push to open doors be sure to allow for an extra 5 mm. Once you have the door in place, mark up any excess width to your panel with a pencil and straight edge. Cut off any excess, being sure to use the right type of saw for the job.
Step 3
Repeat for the height, making sure to include the height of any cornice or pelmets if necessary and mark up any excess height to be trimmed off your clad-on panel. Cut off any excess. If necessary, cover the cut edge of the panel with some colour matched edge tape (sold separately) if it will still be visible when it’s fitted.
Step 4
Clamp your trimmed clad-on panel to your cabinet end. Line up all edges and ensure you have left the right excesses to account for the door thickness. Secure using the recommended size and quantity of screws per panel.