How to fit outdoor lights
Outdoor lighting gives you loads of benefits. It can illuminate your path to the front door. It can help you see who's calling at night and deter burglars. It can let you make the most of your patio on warm summer nights and can create stunning visual effects of light and shadow among your plants.
Safety first
Remember to switch off the mains power at the consumer unit.
Before starting any electrical work, stay safe - get yourself a socket tester (or voltage tester for lighting circuits). They confirm whether circuits are dead and safe to work on.
Check all finished work with a socket tester (or voltage tester for lighting circuits) before using.
For your safety, these products must be installed in accordance with local Building Regulations. If in any doubt, or where required by the law, consult a competent person who is registered with an electrical certification scheme. Further information is available online or from your local authority.
All new and modified installations must comply with the latest IEE Wiring Regulations. Either use an electrician registered with the self certification scheme prescribed in the regulations, or if you carry out the work yourself, you must notify your Local Authority Buidling Control Department to get your work inspected and tested.
Never take risks with electrical safety. Before you start any type of electrical work, you must follow these following safety precautions:
- Switch off the main power at the consumer unit/fuse box. Isolate the circuit you plan to work on by removing the circuit fuse. Put this in your pocket to avoid accidental replacement.
- Or switch off the breaker and lock it if you can.
- Attach a note to the unit to advise you are working on the circuit.
- Check the circuit is dead with a socket tester or voltage tester/meter for lighting circuits.
How to install a light on your house wall
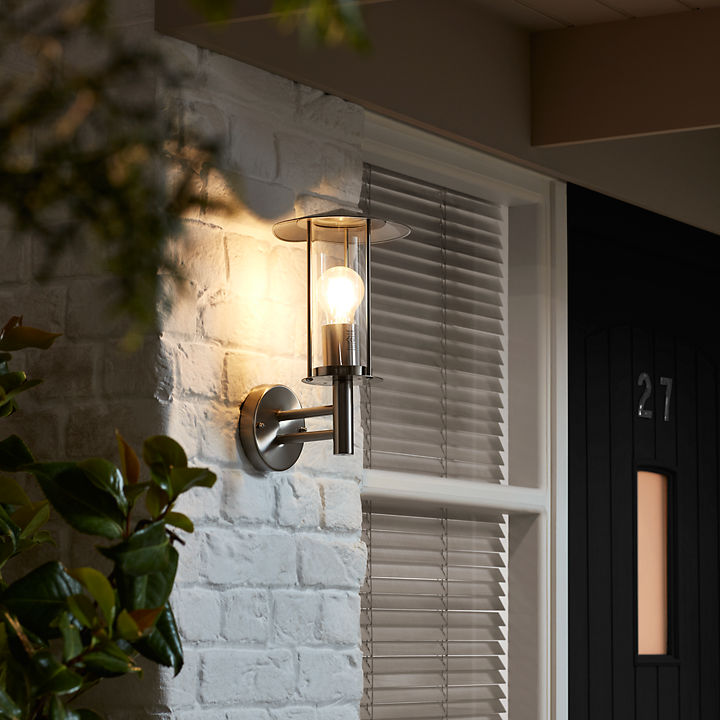
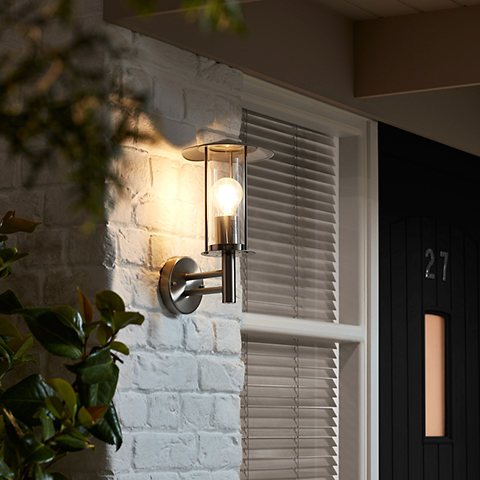
You can attach lights to your house walls to illuminate your front and back doors, and put them on corners to do the same for a pathway. You can connect them by spurs from your existing lighting or power circuits.
If you're doing this, it's a good idea to use an RCD so the power shuts off straight away if there's a fault. Some modern units incorporate an RCD, but you might need to wire one in separately if you have an older model. RCD protection is now compulsory for some electrical devices, so check with an electrician if you're not sure if yours has it. When fitting lights outdoors make sure you only fit weatherproof lights that are especially designed for outdoor use.
Step 1
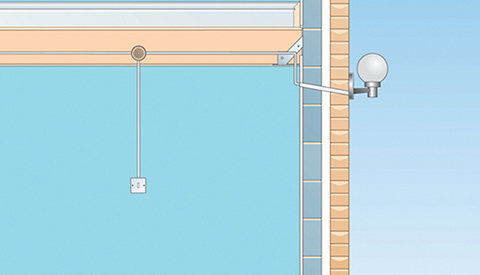
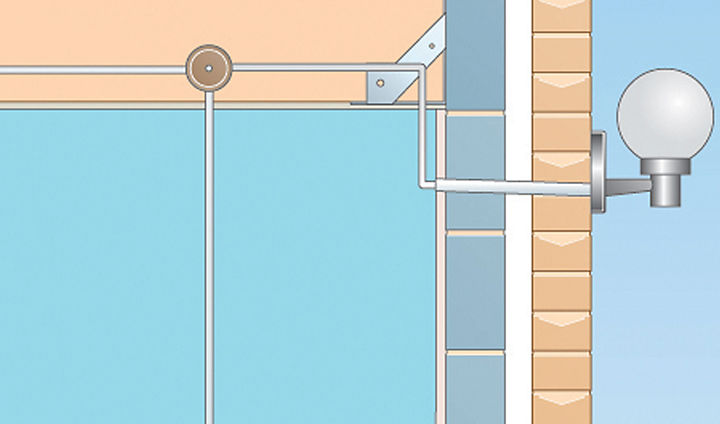
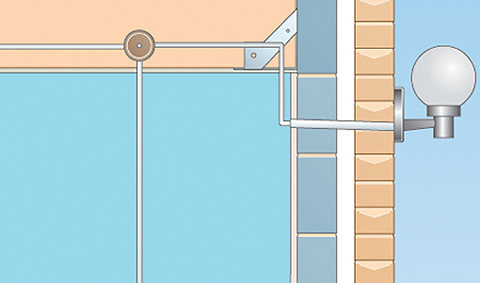
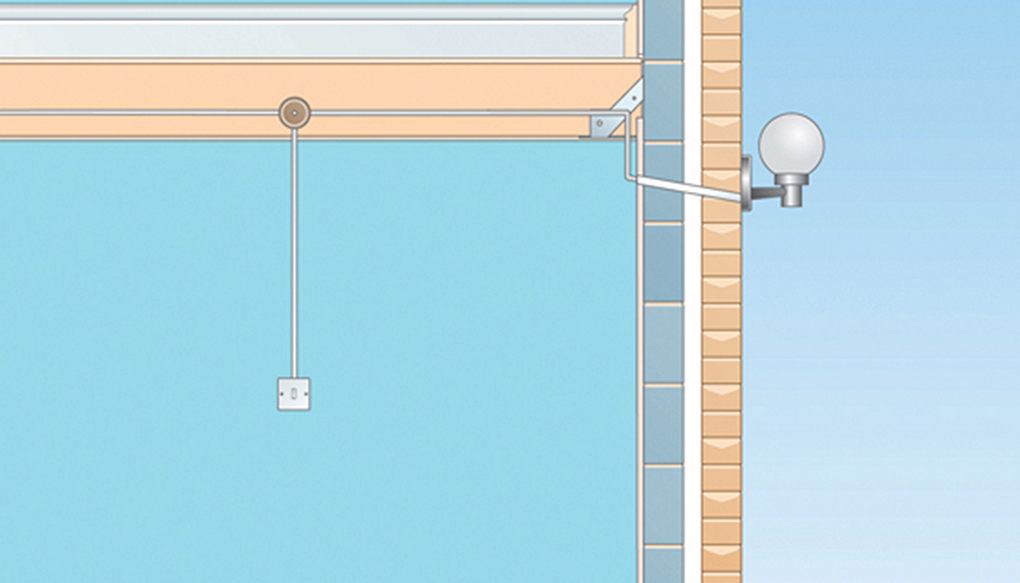
Drill a hole where you want your light to go, so it runs downhill slightly towards the outside. Then line the hole with plastic conduit and feed the cable through.
Step 2
Connect the cable cores to the correct terminals within the unit or to its flex cores using strip connectors. Wrap these tightly in PVC electrical tape to keep out damp.
Step 3
Fix the light to your wall and put on a bead of silicone sealant to stop any moisture getting in.
Step 4
Inside the house, run the light supply cable back to a suitable position for cutting into a main lighting circuit cable with a four-terminal junction box.
Step 5
Install a switch and run a length of 1mm² two core-and-earth cable back to the position of the junction box.
Step 6
Isolate the circuit and double-check the power is off with a voltage tester. Then cut through the main circuit cable and make the appropriate connections in the junction box.
How to run a spur from a power circuit
If you decide to run an outside wall light off a main power circuit (which you'll need to do if you plan to fit a high-wattage floodlight), first identify a suitable socket from which to run a spur. This circuit must have RCD protection.
Top tip - Security lighting
For maximum peace of mind, choose a floodlight with PIR (passive infrared sensor) motion detection. The sensor automatically activates the floodlight when it detects movement. The same fitting can also provide automatic low level lighting from dusk to dawn.
Step 1
You'll need to run the spur in 2.5mm² two-core-and-earth cable to the 'feed' terminals of a fused connection unit which contains a 5 amp fuse. If this has a switch, you can use it to turn the light on and off - otherwise, you'll need a separate switch.
Step 2
From the 'load' terminals of the fused connection unit, run 1mm² two-core-and-earth cable directly to the light (if your unit has a switch), or to a four-terminal junction box - from which you can run separate switch drop and light supply cables.
Mains-powered garden lighting
ou can power your garden lights from a spur off a ring circuit, via a 5 amp fused connection unit. Once outdoors, you should supply your lights via 1.5mm² three core steel-wire-armoured cable (SWA). Make sure that you only fit weatherproof lights that are suitable for outdoor use and that your circuit is RCD-protected.
Working with steel-wire-armoured (SWA) cable
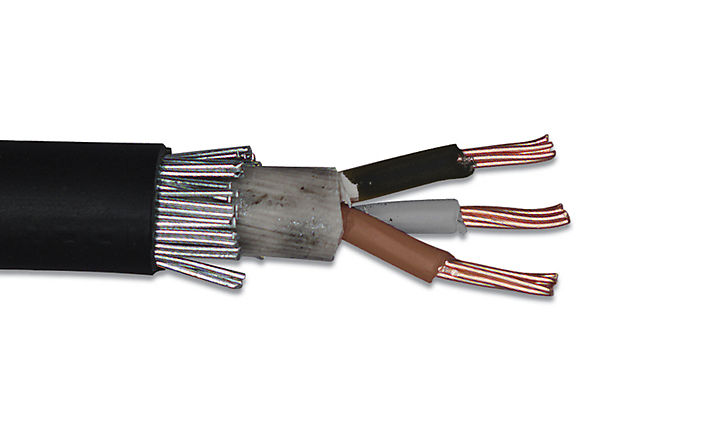
- The cores of three-core SWA are coloured brown, black and grey, and you must fit green/yellow sleeving over the black core at every connection to show this is being used as earth.
- You should bury SWA, as if you accidentally cut through it could be fatal. Lay it in a trench at least 450mm deep under a path or driveway, or 750mm deep below unpaved areas that may be dug up at some point. As an extra precaution, you could run electrical route marker tape above the cable at a depth of about 150mm.
- You must secure SWA to your house wall with SWA cable clips. Fix these to the masonry with suitable plugs and screws, and protect it where necessary.
- Use a junior hacksaw to cut through SWA, and pliers to strip back the armouring.
- Connect the SWA cores to those of 1.5mm² two-core-and earth cable in a weatherproof adaptable box that's fixed to your house wall. The SWA must enter the box via a purpose-made weatherproof gland, covered in a plastic gland shroud - and it's very important to use the correct fittings to stop the cable armouring becoming corroded. Also, if your adaptable box is painted, try to clean off the paint where the cable enters it. This gives you good metal-to-metal contact - which will effectively earth the armouring.
- When you connect the cable to your lights, pay particular attention to the earth connections and any waterproof seals, as it's vital your units are weatherproof. You'll also need glands to protect the SWA as it enters the lights (follow the manufacturer's instructions to do this).
How to fit low-voltage garden lighting
When it comes to garden lighting, a low-voltage set-up is the simplest and safest to install. Often the light units are on spikes, which you just push into the ground. The lights take their power from the transformer via ordinary two-core cable.
One Planet Home - Solar-powered garden lights
Easy to install with no mains wiring, solar garden lights won't add a penny to your electricity bill.
Step 1
The lights are fed by a 12-volt transformer, which you should plug into a convenient socket indoors or in your shed or garage, as you need to protect it from the weather. The cable size depends on the circuit length and load. You can pass it through a hole that you drill in the wall and line with conduit, or a hole in a door or window frame.
Step 2
Plug the hole with silicone sealant to keep any moisture at bay. Because of the low voltage, you can safely lay the cable on or just below the surface. But to avoid the trip hazard of loose cable (not to mention the sheer inconvenience of putting a garden spade through it at some future date), it's better to bury it about 450mm deep. Lay electrical route marker tape above it at a depth of about 150mm to show it's there.
Safety first
Remember to switch off the mains power at the consumer unit.
Before starting any electrical work, stay safe - get yourself a socket tester (or voltage tester for lighting circuits). They confirm whether circuits are dead and safe to work on.
Check all finished work with a socket tester (or voltage tester for lighting circuits) before using.
For your safety, these products must be installed in accordance with local Building Regulations. If in any doubt, or where required by the law, consult a competent person who is registered with an electrical certification scheme. Further information is available online or from your local authority.
All new and modified installations must comply with the latest IEE Wiring Regulations. Either use an electrician registered with the self certification scheme prescribed in the regulations, or if you carry out the work yourself, you must notify your Local Authority Buidling Control Department to get your work inspected and tested.
Never take risks with electrical safety. Before you start any type of electrical work, you must follow these following safety precautions:
- Switch off the main power at the consumer unit/fuse box. Isolate the circuit you plan to work on by removing the circuit fuse. Put this in your pocket to avoid accidental replacement.
- Or switch off the breaker and lock it if you can.
- Attach a note to the unit to advise you are working on the circuit.
- Check the circuit is dead with a socket tester or voltage tester/meter for lighting circuits.
How to install a light on your house wall
You can attach lights to your house walls to illuminate your front and back doors, and put them on corners to do the same for a pathway. You can connect them by spurs from your existing lighting or power circuits.
If you're doing this, it's a good idea to use an RCD so the power shuts off straight away if there's a fault. Some modern units incorporate an RCD, but you might need to wire one in separately if you have an older model. RCD protection is now compulsory for some electrical devices, so check with an electrician if you're not sure if yours has it. When fitting lights outdoors make sure you only fit weatherproof lights that are especially designed for outdoor use.
Step 1
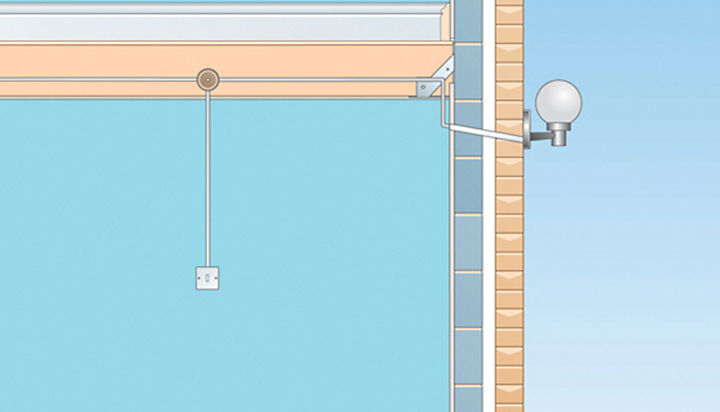
Drill a hole where you want your light to go, so it runs downhill slightly towards the outside. Then line the hole with plastic conduit and feed the cable through.
Step 2
Connect the cable cores to the correct terminals within the unit or to its flex cores using strip connectors. Wrap these tightly in PVC electrical tape to keep out damp.
Step 3
Fix the light to your wall and put on a bead of silicone sealant to stop any moisture getting in.
Step 4
Inside the house, run the light supply cable back to a suitable position for cutting into a main lighting circuit cable with a four-terminal junction box.
Step 5
Install a switch and run a length of 1mm² two core-and-earth cable back to the position of the junction box.
Step 6
Isolate the circuit and double-check the power is off with a voltage tester. Then cut through the main circuit cable and make the appropriate connections in the junction box.
How to run a spur from a power circuit
If you decide to run an outside wall light off a main power circuit (which you'll need to do if you plan to fit a high-wattage floodlight), first identify a suitable socket from which to run a spur. This circuit must have RCD protection.
Top tip - Security lighting
For maximum peace of mind, choose a floodlight with PIR (passive infrared sensor) motion detection. The sensor automatically activates the floodlight when it detects movement. The same fitting can also provide automatic low level lighting from dusk to dawn.
Step 1
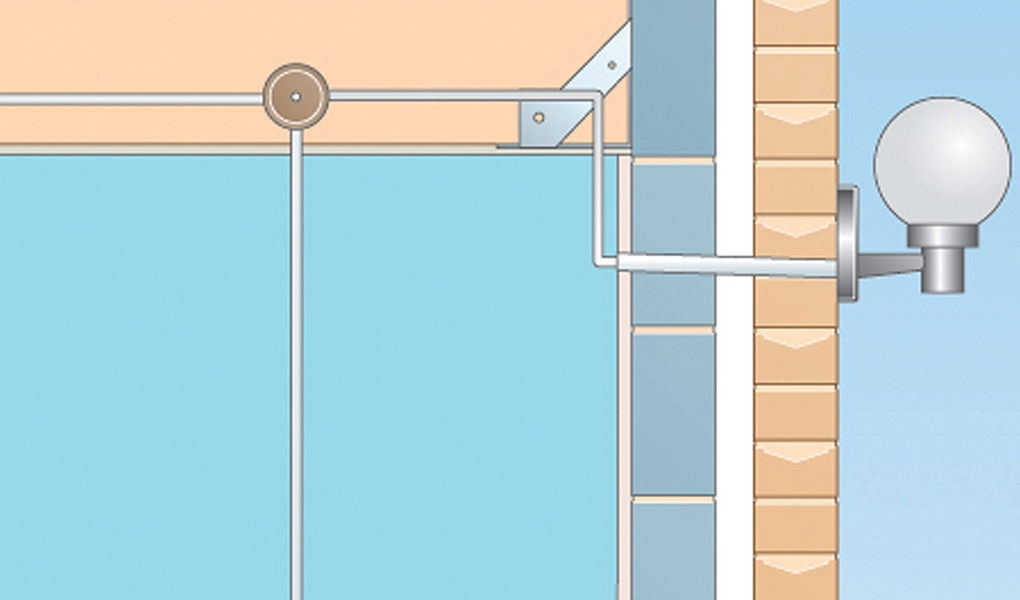
You'll need to run the spur in 2.5mm² two-core-and-earth cable to the 'feed' terminals of a fused connection unit which contains a 5 amp fuse. If this has a switch, you can use it to turn the light on and off - otherwise, you'll need a separate switch.
Step 2
From the 'load' terminals of the fused connection unit, run 1mm² two-core-and-earth cable directly to the light (if your unit has a switch), or to a four-terminal junction box - from which you can run separate switch drop and light supply cables.
Mains-powered garden lighting
ou can power your garden lights from a spur off a ring circuit, via a 5 amp fused connection unit. Once outdoors, you should supply your lights via 1.5mm² three core steel-wire-armoured cable (SWA). Make sure that you only fit weatherproof lights that are suitable for outdoor use and that your circuit is RCD-protected.
Working with steel-wire-armoured (SWA) cable
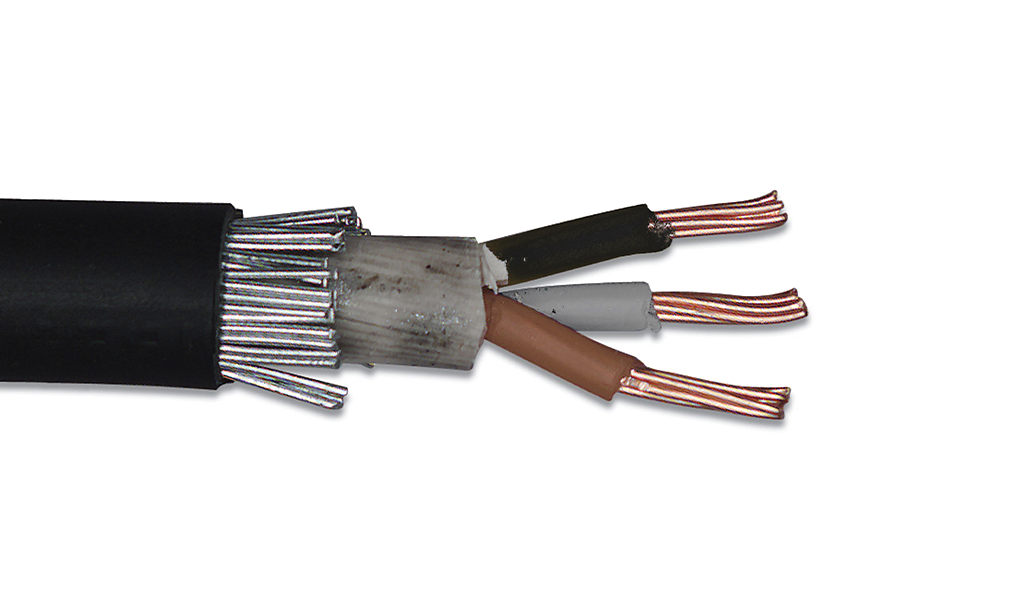
- The cores of three-core SWA are coloured brown, black and grey, and you must fit green/yellow sleeving over the black core at every connection to show this is being used as earth.
- You should bury SWA, as if you accidentally cut through it could be fatal. Lay it in a trench at least 450mm deep under a path or driveway, or 750mm deep below unpaved areas that may be dug up at some point. As an extra precaution, you could run electrical route marker tape above the cable at a depth of about 150mm.
- You must secure SWA to your house wall with SWA cable clips. Fix these to the masonry with suitable plugs and screws, and protect it where necessary.
- Use a junior hacksaw to cut through SWA, and pliers to strip back the armouring.
- Connect the SWA cores to those of 1.5mm² two-core-and earth cable in a weatherproof adaptable box that's fixed to your house wall. The SWA must enter the box via a purpose-made weatherproof gland, covered in a plastic gland shroud - and it's very important to use the correct fittings to stop the cable armouring becoming corroded. Also, if your adaptable box is painted, try to clean off the paint where the cable enters it. This gives you good metal-to-metal contact - which will effectively earth the armouring.
- When you connect the cable to your lights, pay particular attention to the earth connections and any waterproof seals, as it's vital your units are weatherproof. You'll also need glands to protect the SWA as it enters the lights (follow the manufacturer's instructions to do this).
How to fit low-voltage garden lighting
When it comes to garden lighting, a low-voltage set-up is the simplest and safest to install. Often the light units are on spikes, which you just push into the ground. The lights take their power from the transformer via ordinary two-core cable.
One Planet Home - Solar-powered garden lights
Easy to install with no mains wiring, solar garden lights won't add a penny to your electricity bill.
Step 1
The lights are fed by a 12-volt transformer, which you should plug into a convenient socket indoors or in your shed or garage, as you need to protect it from the weather. The cable size depends on the circuit length and load. You can pass it through a hole that you drill in the wall and line with conduit, or a hole in a door or window frame.
Step 2
Plug the hole with silicone sealant to keep any moisture at bay. Because of the low voltage, you can safely lay the cable on or just below the surface. But to avoid the trip hazard of loose cable (not to mention the sheer inconvenience of putting a garden spade through it at some future date), it's better to bury it about 450mm deep. Lay electrical route marker tape above it at a depth of about 150mm to show it's there.
Frequently Asked Questions
- How much does it cost to install an outside light?
Typical installation costs vary, expect from about £60 for a simple replacement hardwired wall light to £150–£350 for a new outside circuit or sensor floodlight fitted by a qualified electrician. Final cost depends on the type of light, whether new wiring or a new consumer unit is needed, access and labour time, and any required certification. Always get written quotes from NICEIC or other registered installers before work begins.
- Do I need an electrician to fit an outside light?
No, not always, battery, solar or plug-in exterior lights can usually be fitted yourself following the manufacturer’s instructions and isolating power where needed. For new mains or hardwired exterior lights, and any work that affects house wiring, you should use a qualified electrician, as installations must comply with Part P building regulations and safety standards. Always ensure outdoor fittings are IP rated for external use and have the circuit isolated before any work.
- How much does labor cost to install outdoor lights?
Labour to install outdoor lights typically costs between about £100 and £400 per installation, depending on complexity. Factors that affect price include access, whether new wiring or a consumer unit change is needed, trenching or conduit, number of lights and fittings, and whether a qualified electrician is required for a certificated job. For an accurate figure, get a written quote from a qualified electrician who can assess your specific requirements.
- Can I install an outside light myself?
Yes, you can fit many outside lights yourself, but mains-powered installations should be carried out by a qualified electrician. Battery, solar or plug-in options are straightforward to install, however mains fittings need to comply with UK electrical regulations and may require a competent person notification. Always isolate the supply before work, choose a suitable IP-rated fitting, use outdoor-rated cable and connectors, fix securely, follow the manufacturer’s instructions and test the circuit once installed.