How to install Neva composite and wooden slats
Installing Neva composite and wooden slats
Once all the posts are fixed into position and any concrete footings have set hard, you’re ready to install the slats to the configuration of your choice.
Easy to assemble, the composite or wooden slats slide into the slotted fence posts and lock together with their tongue and groove edges. Fixings are then fitted on top of the finishing profile to keep the slats locked into position.


The composite slats measure 155mm by 1790mm and come in a pack of three. One pack creates a height of 450cm and four packs stacks up to 1.8m.
Wooden slats measure 132mm by 1790mm and these are available individually. 13 slats are required to complete a 1.8m fence.
We’ll show you how to install composite slats into aluminium posts, plus tips on fitting wooden slats. If you are using steel or wooden posts, the final assembly of the fixings will vary ever so slightly, but the product instruction leaflet will detail exactly how to fit each component.
Safety first:
- We recommend the help and assistance of a friend when carrying heavy items or working at height.
Tools for the job
- Stepladder, might be required depending on the height of the fence
- Spirit level
- Drill driver and 2.5mm metal drill bit
- Cross-head screwdriver
- Hex key set to fit fixings to an aluminium post
- Tape to make a depth gauge when drilling
- Neva composite fence slats (pack of 3)
- Neva wood fence slats (sold individually)
- Neva aluminium start and end profile, for composite slats
- Neva wood finishing profile, for wooden slats
- Rigger gloves
Step 1
If you are installing wooden slats, you do not require a start profile, but you will need the Neva wood finishing profile on top of the final slat to cap off the top of the fence, so you can jump to step 3.
If you are fitting composite slats, Neva aluminium start and end profiles are required to finish the bottom and top of the fence. First of all, ensure the rubber end caps are in place at either end of the start profiles (as shown).

Step 2
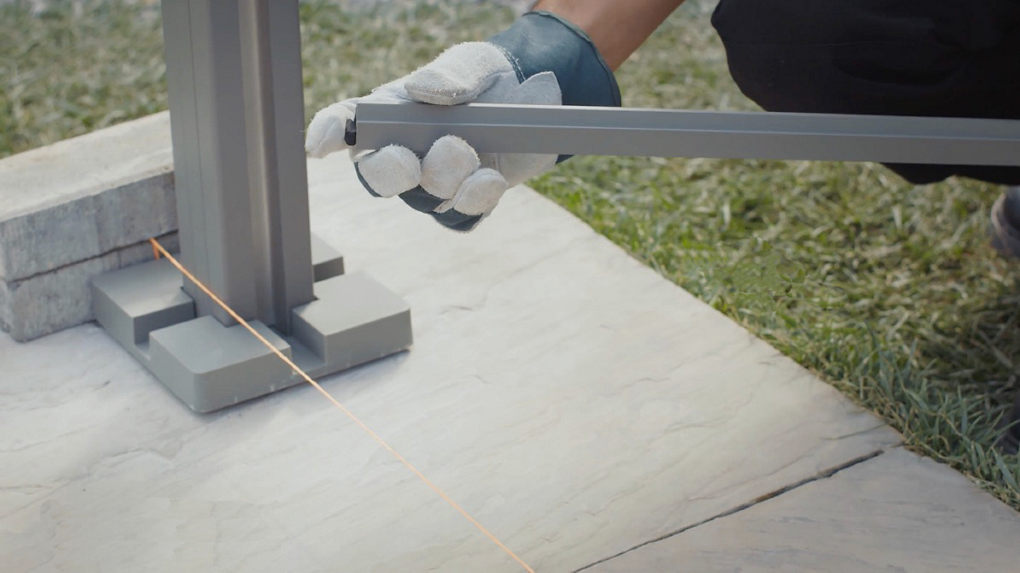
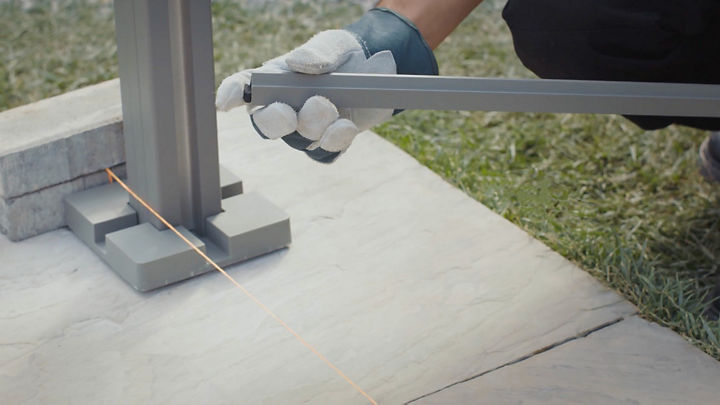
Slide the start profile into the post’s recesses and check it is level with a spirit level.


Step 3
The post base and covers will raise the bottom of the fence off of the ground by a few millimetres. If you need to maintain the height at one end (for example if you have a slightly sloped surface), make a filler or gravel board for the bottom of the recess out of treated hardwood and slide it into position to achieve the desired height to maintain a level, horizontal fence. Please note, Neva slats (wooden or composite) should not be used to make the gravel board.
Step 4
Insert the slats one at a time, groove down and tongue uppermost. Firmly push fit each one into place, and check they stay level with a spirit level.
Continue until you reach the desired height and use a stepladder if required.


When the slats are in place, there will be an allowance for expansion / contraction of the boards. For example, between aluminium posts this will be 5mm at each end. Between steel posts it is 16mm at either end.


Step 5
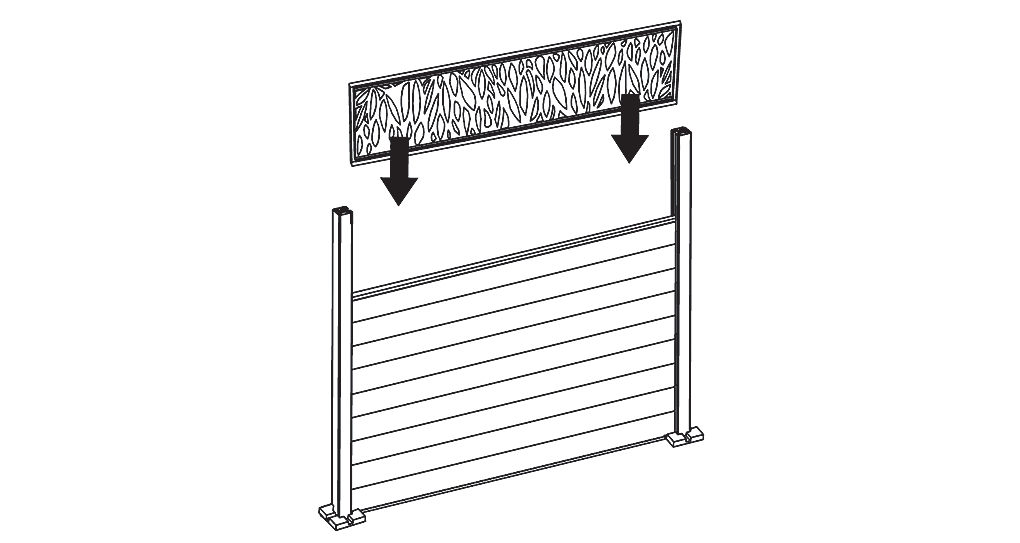
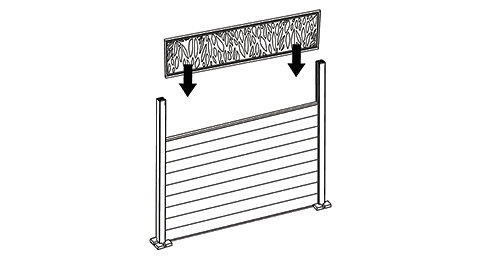
Once you’ve reached the desired height, finish the top slat off with the matching finishing profile (either aluminium or wood, depending on your slats). Slide it through the recess and push it onto the top slat’s tongue. Don't forget to add rubber end caps onto the aluminium finishing profiles.


If you are adding a decorative panel or trellis to the top of the slats, simply slide this into position on top of the slat’s finishing profile first and then fix this down as per the instructions below.

Step 6
Securing the final slat and finishing profile (or trellis) to the post will vary slightly depending on what posts you have. Here’s what to do to fix composite slats to an aluminium post, the product instructions will explain what to for the other posts. The fixings are supplied with all the post kits.
Slide on the L bracket, with the longest length resting on top of the finishing profile.
Insert and tighten the hex socket cap to the post with the correct sized hex key.


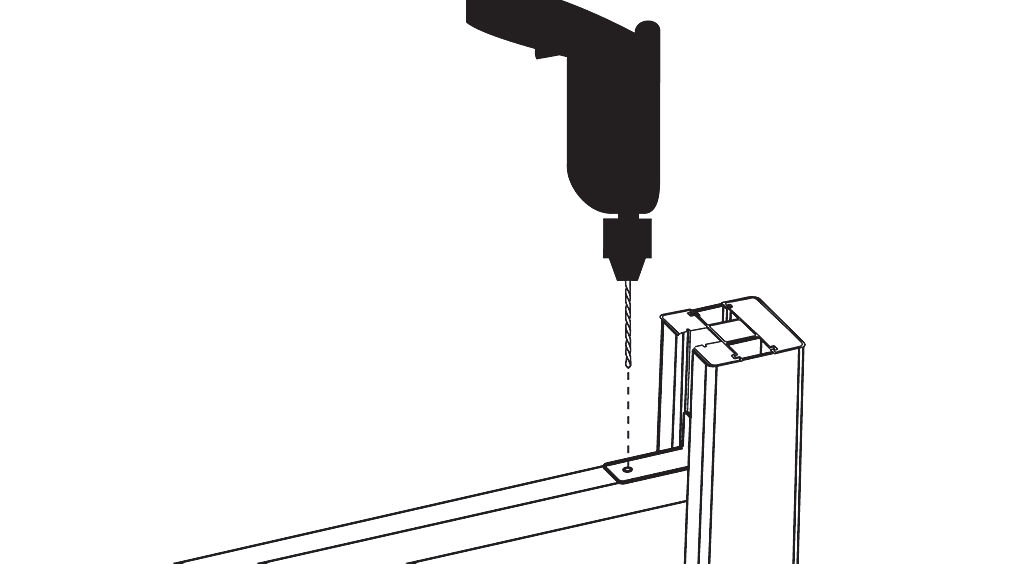
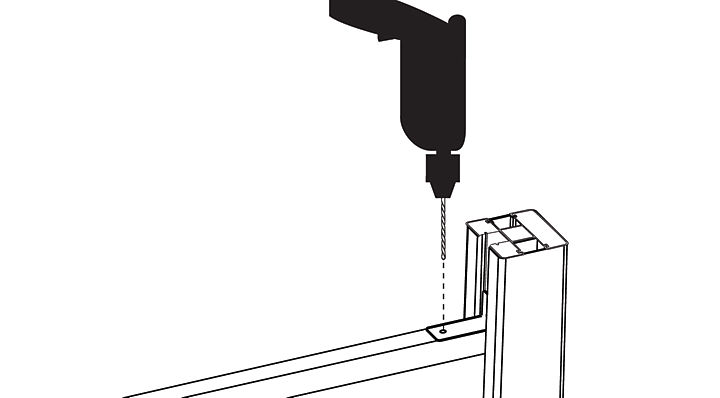
Step 7
Measure and mark the depth of the screw on the drill bit with a piece of tape.
Step 8
Using a 2.5mm metal drill bit and drill driver, drill down through the screw hole (in the L bracket) into the finishing profile.

Step 9
Insert the screw and tighten it with a crosshead (Phillips) screwdriver.


Step 10
Slide down the small cover plate to hide the fixings within the post.


Step 11
If you want to fit panels or a wooden wind-breaker, head over to How to install Neva panels.
Once all the slats are in place, you're ready to complete the look with matching post caps. See How to fit post caps to Neva posts for more information on what to do next. If you have LED post lights to fit, read How to install Neva solar powered LED post lights first before fitting the post caps as they will be replaced by the solar panel top.